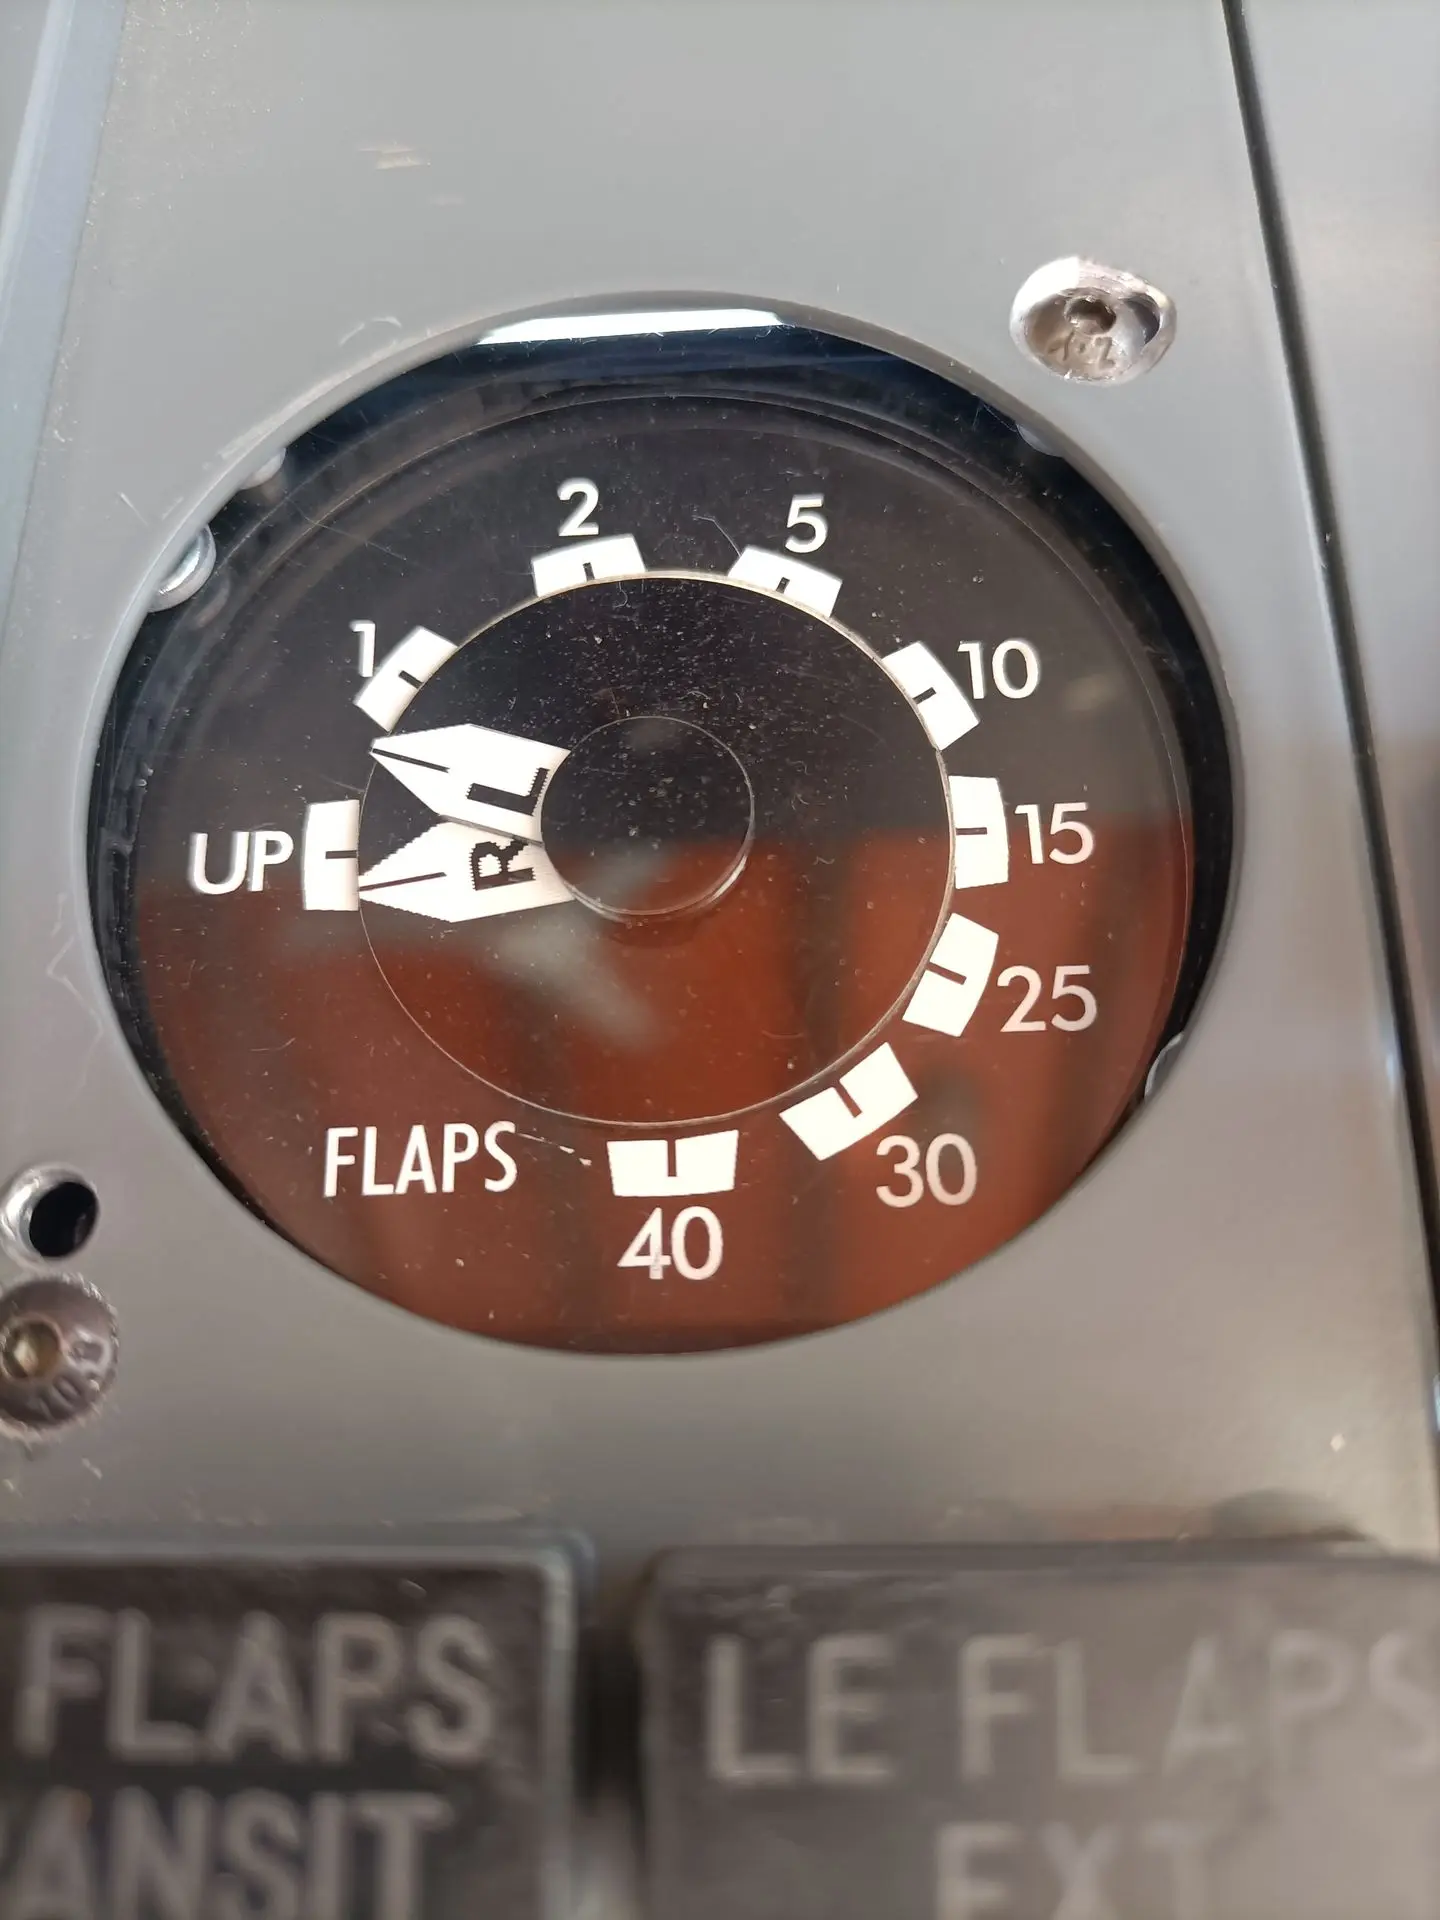
A 737 has a flap gauge with two pointers, left and right. The one that was mounted on my MIP had only one pointer. Because this is not what it is supposed to be, I decided to order a new one with two pointers. I ordered one from customsimparts.com (in the US).
So let's see how that came out...
So I ordered a flap gauge with dual pointers, when it arrived I had to pay extra import taxes which made it a really expensive gauge.
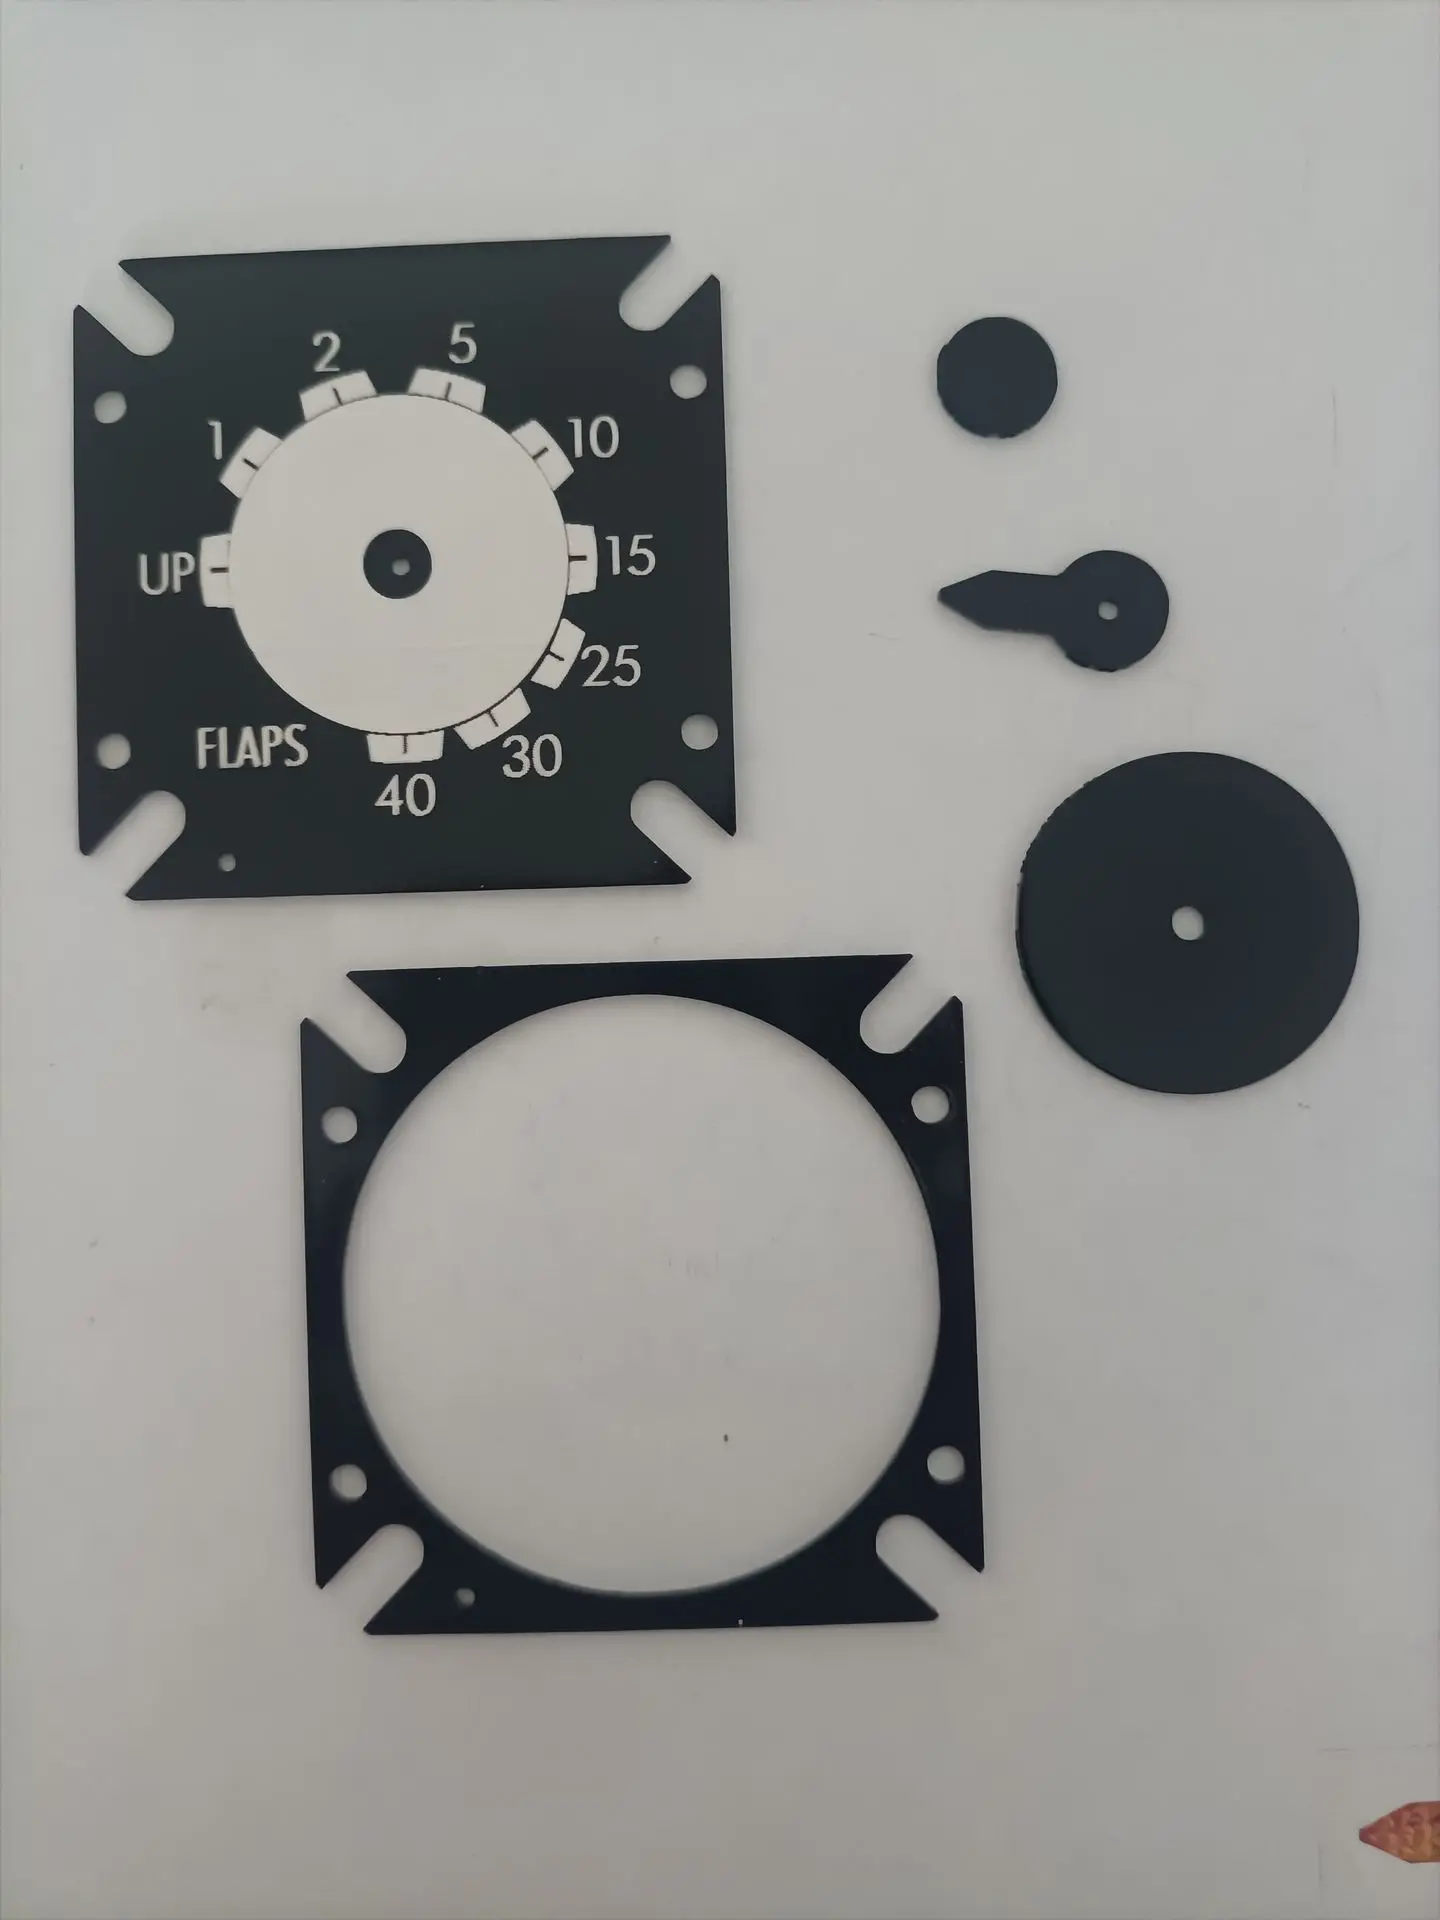
By unpacking the gauge, I realized that the dial itself was rather small in comparison to the gauge itself. Another thing is that because of the built up on top of the dial plate, it was very far behind the MIP. Why did I not see all that on the displayed pictures on their website ?? Well, besides being an expensive gauge, I now have to modify this one instead of using it directly. That will mean a new dial and a new front built up with a thinner glass and thinner pointers, so that the dial plate and pointers are really close behind the MIP.
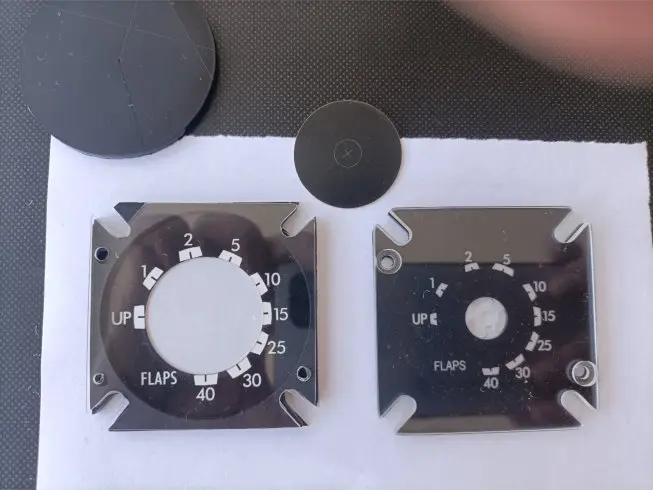
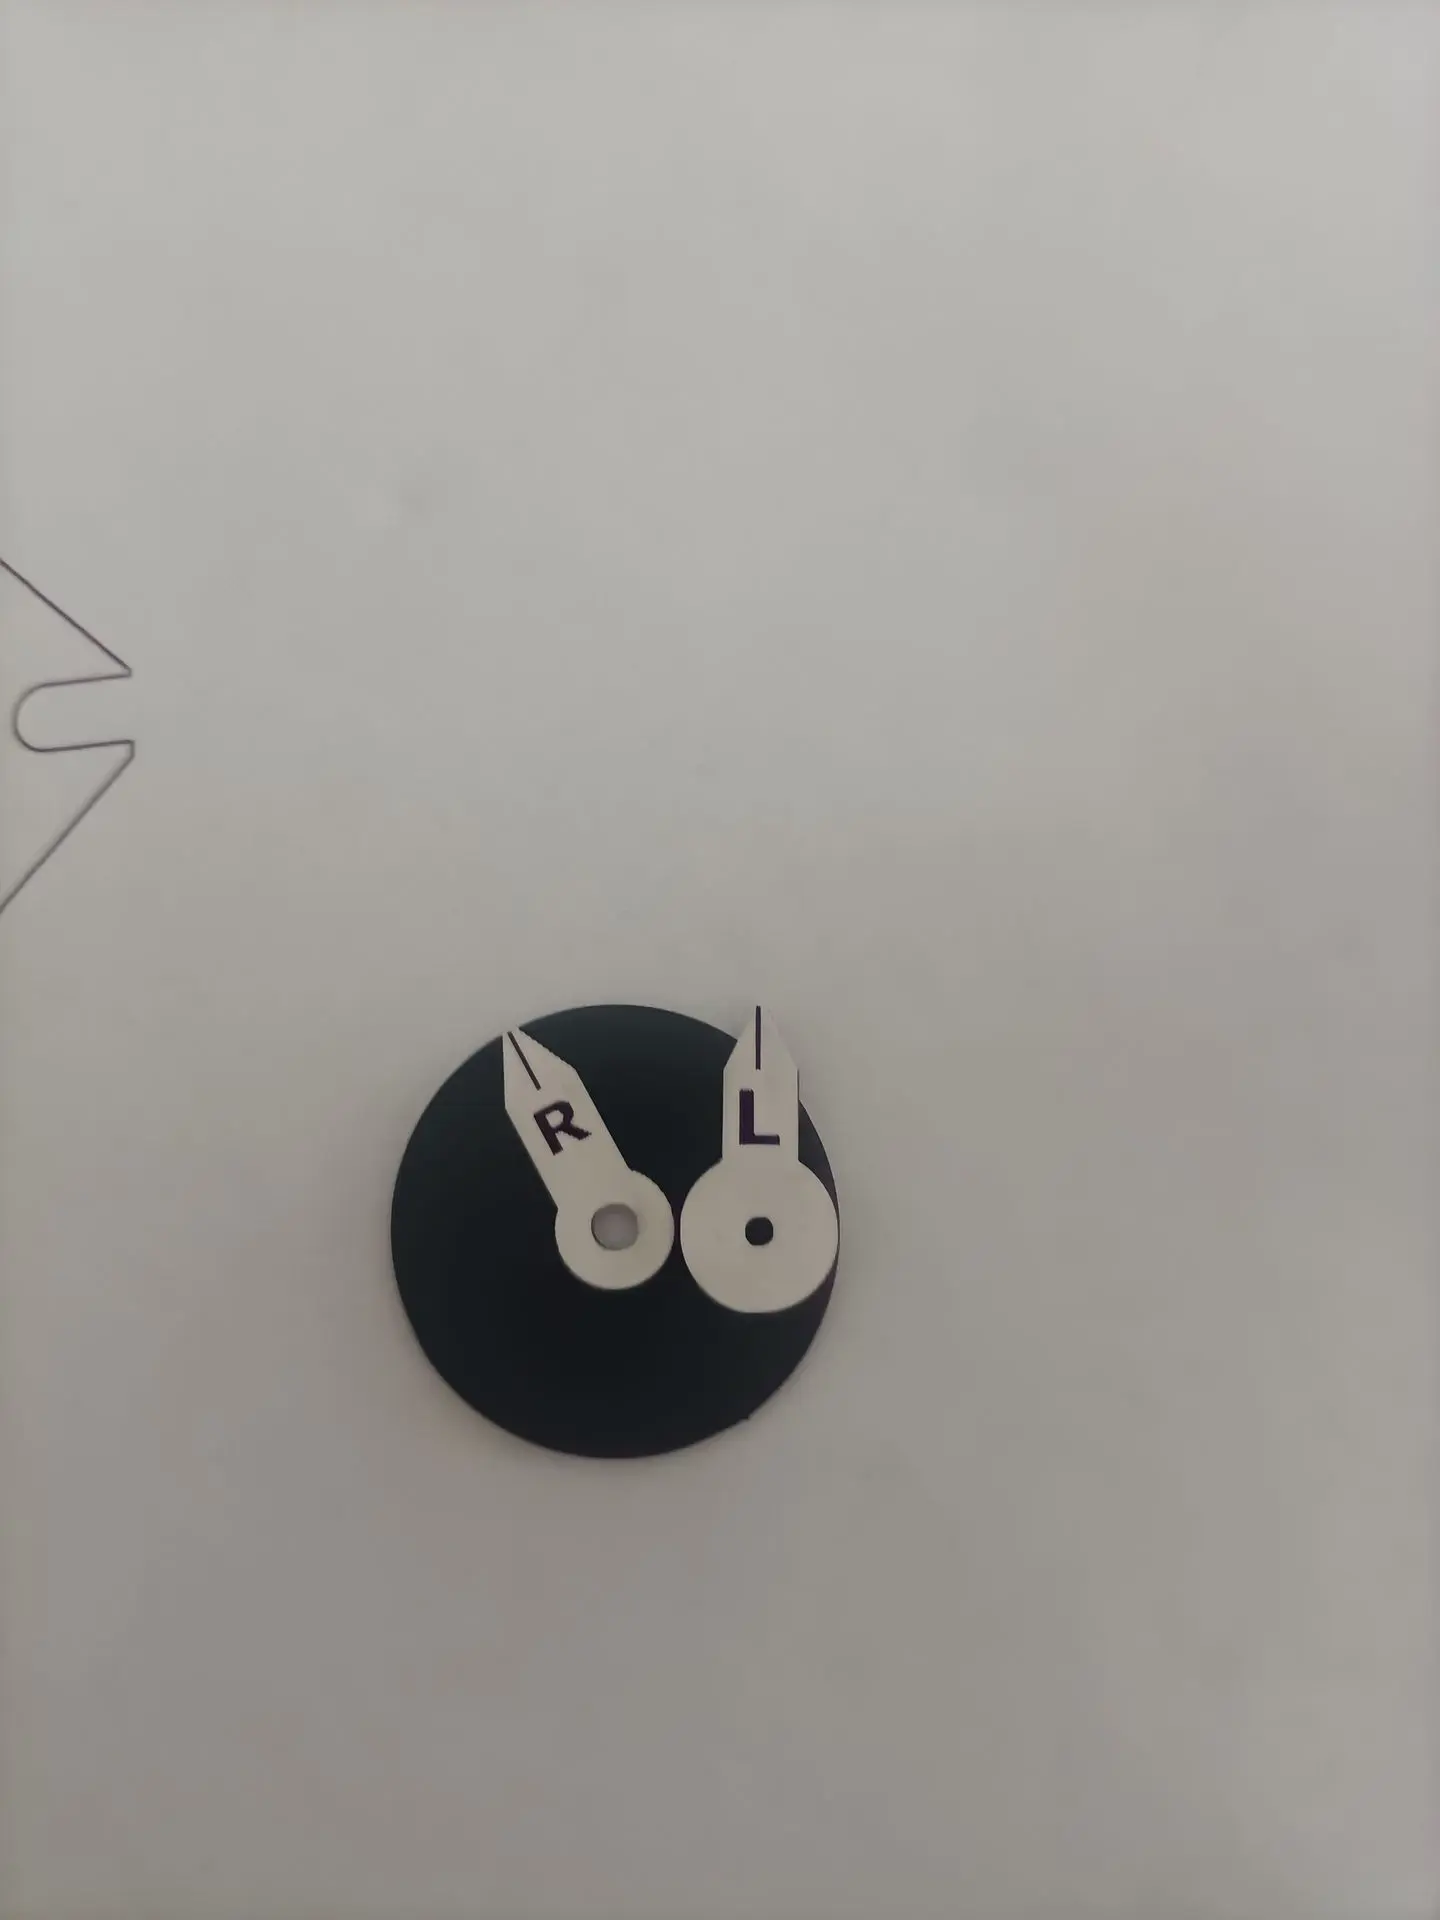
The picture on the left side is the dial that I made, and on the right side of the picture the dial that was mounted on the gauge from customsimparts.com .
Mine resembled more the original, and the markings on the dial plate are also bigger and easier to read.
By changing all this, I also had to change the axes that connect the pointers to the two servo motors.
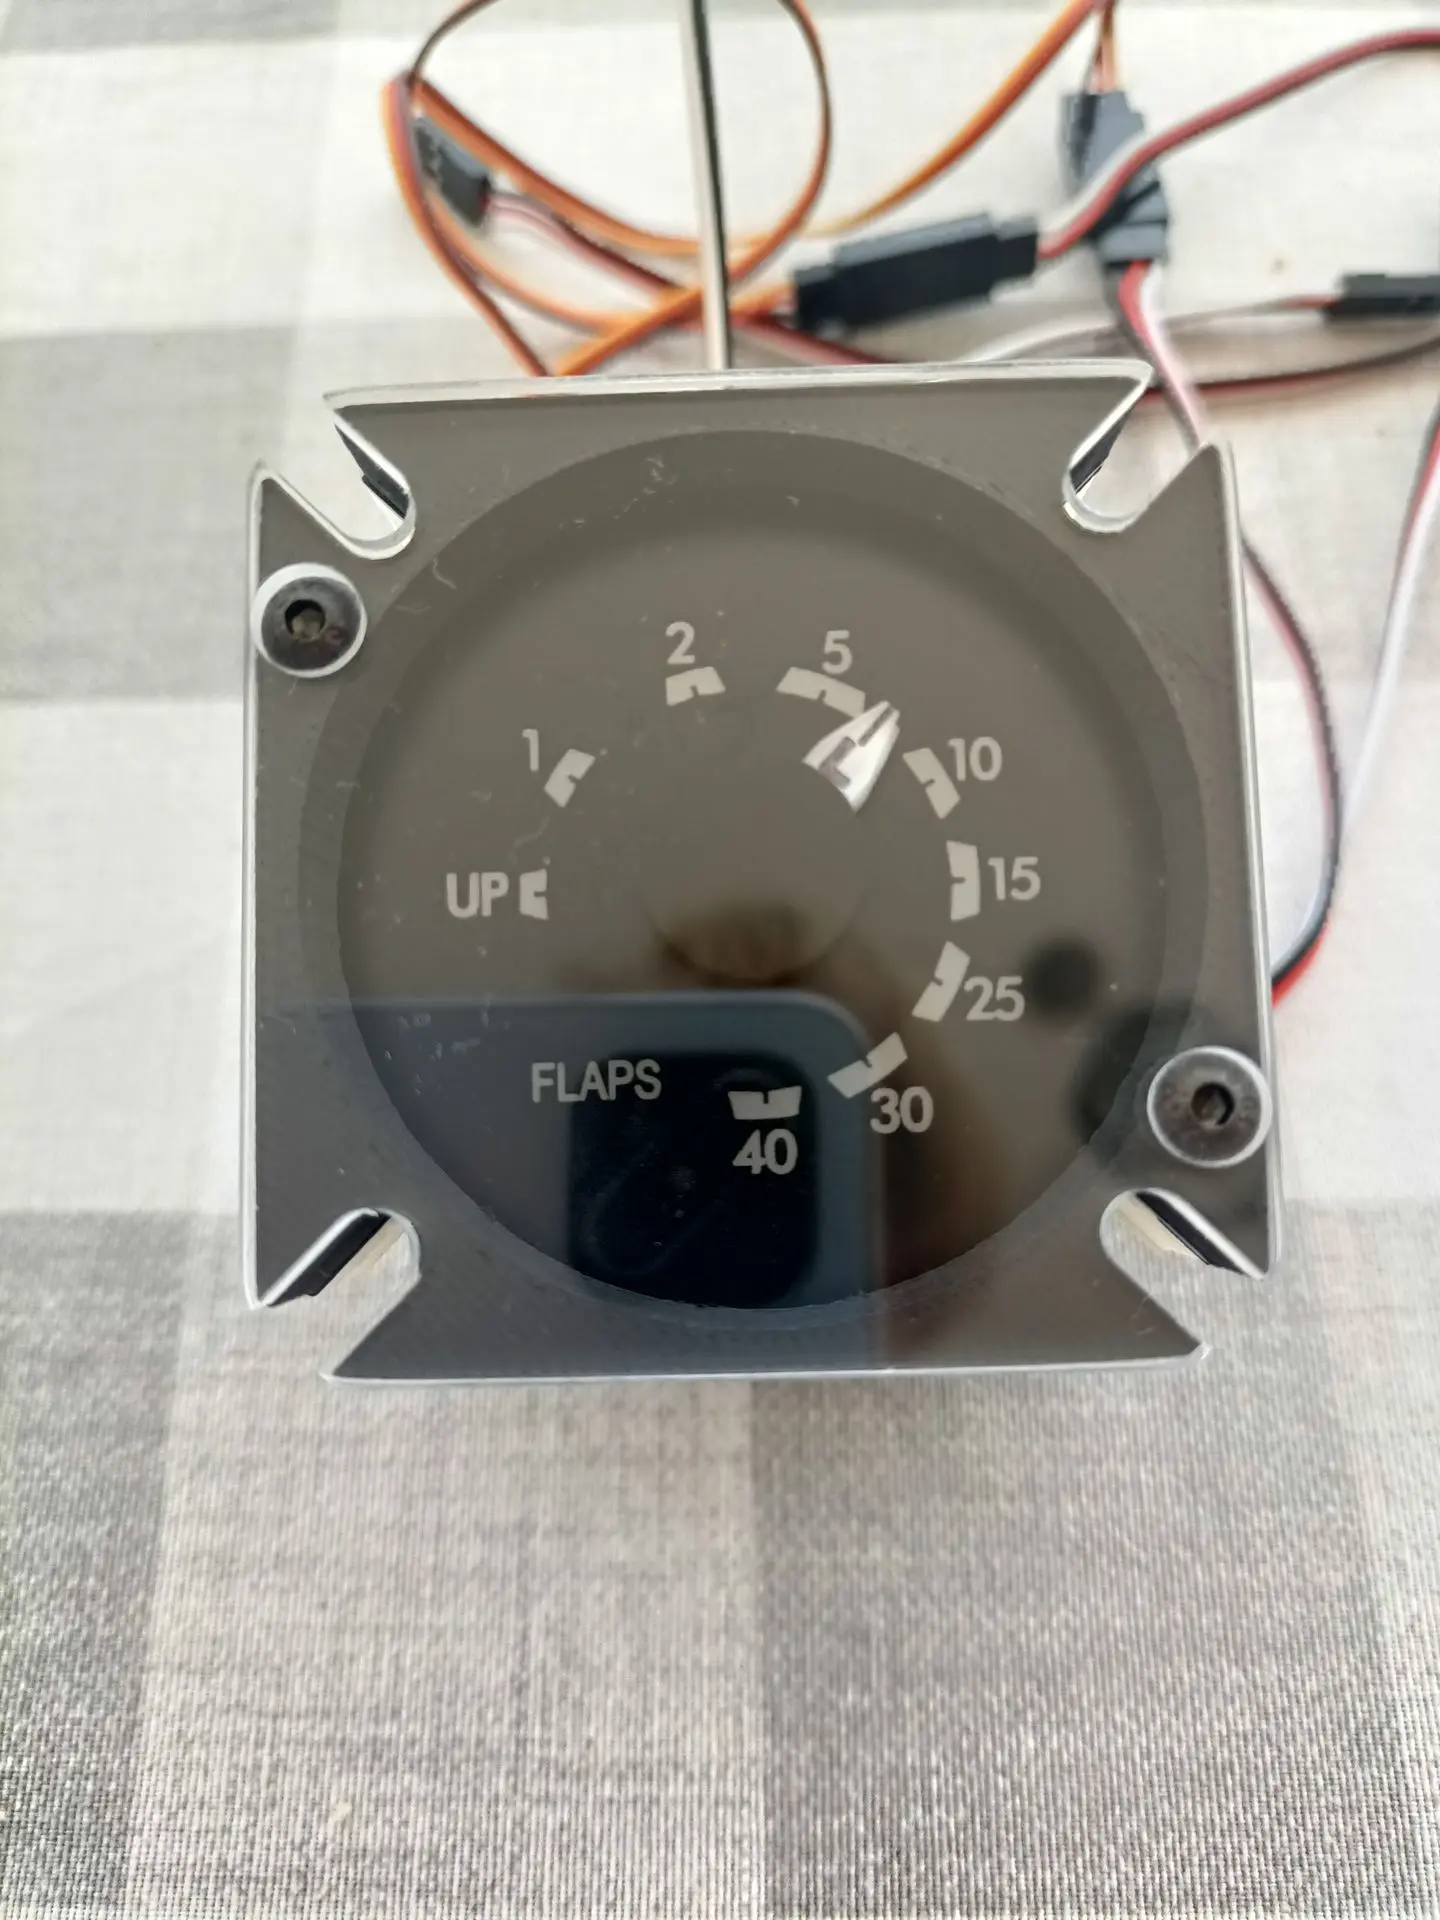
Original gauge below before rebuilding.
Note the rather small indications on the dial and the actual pointers are to deep behind the MIP.
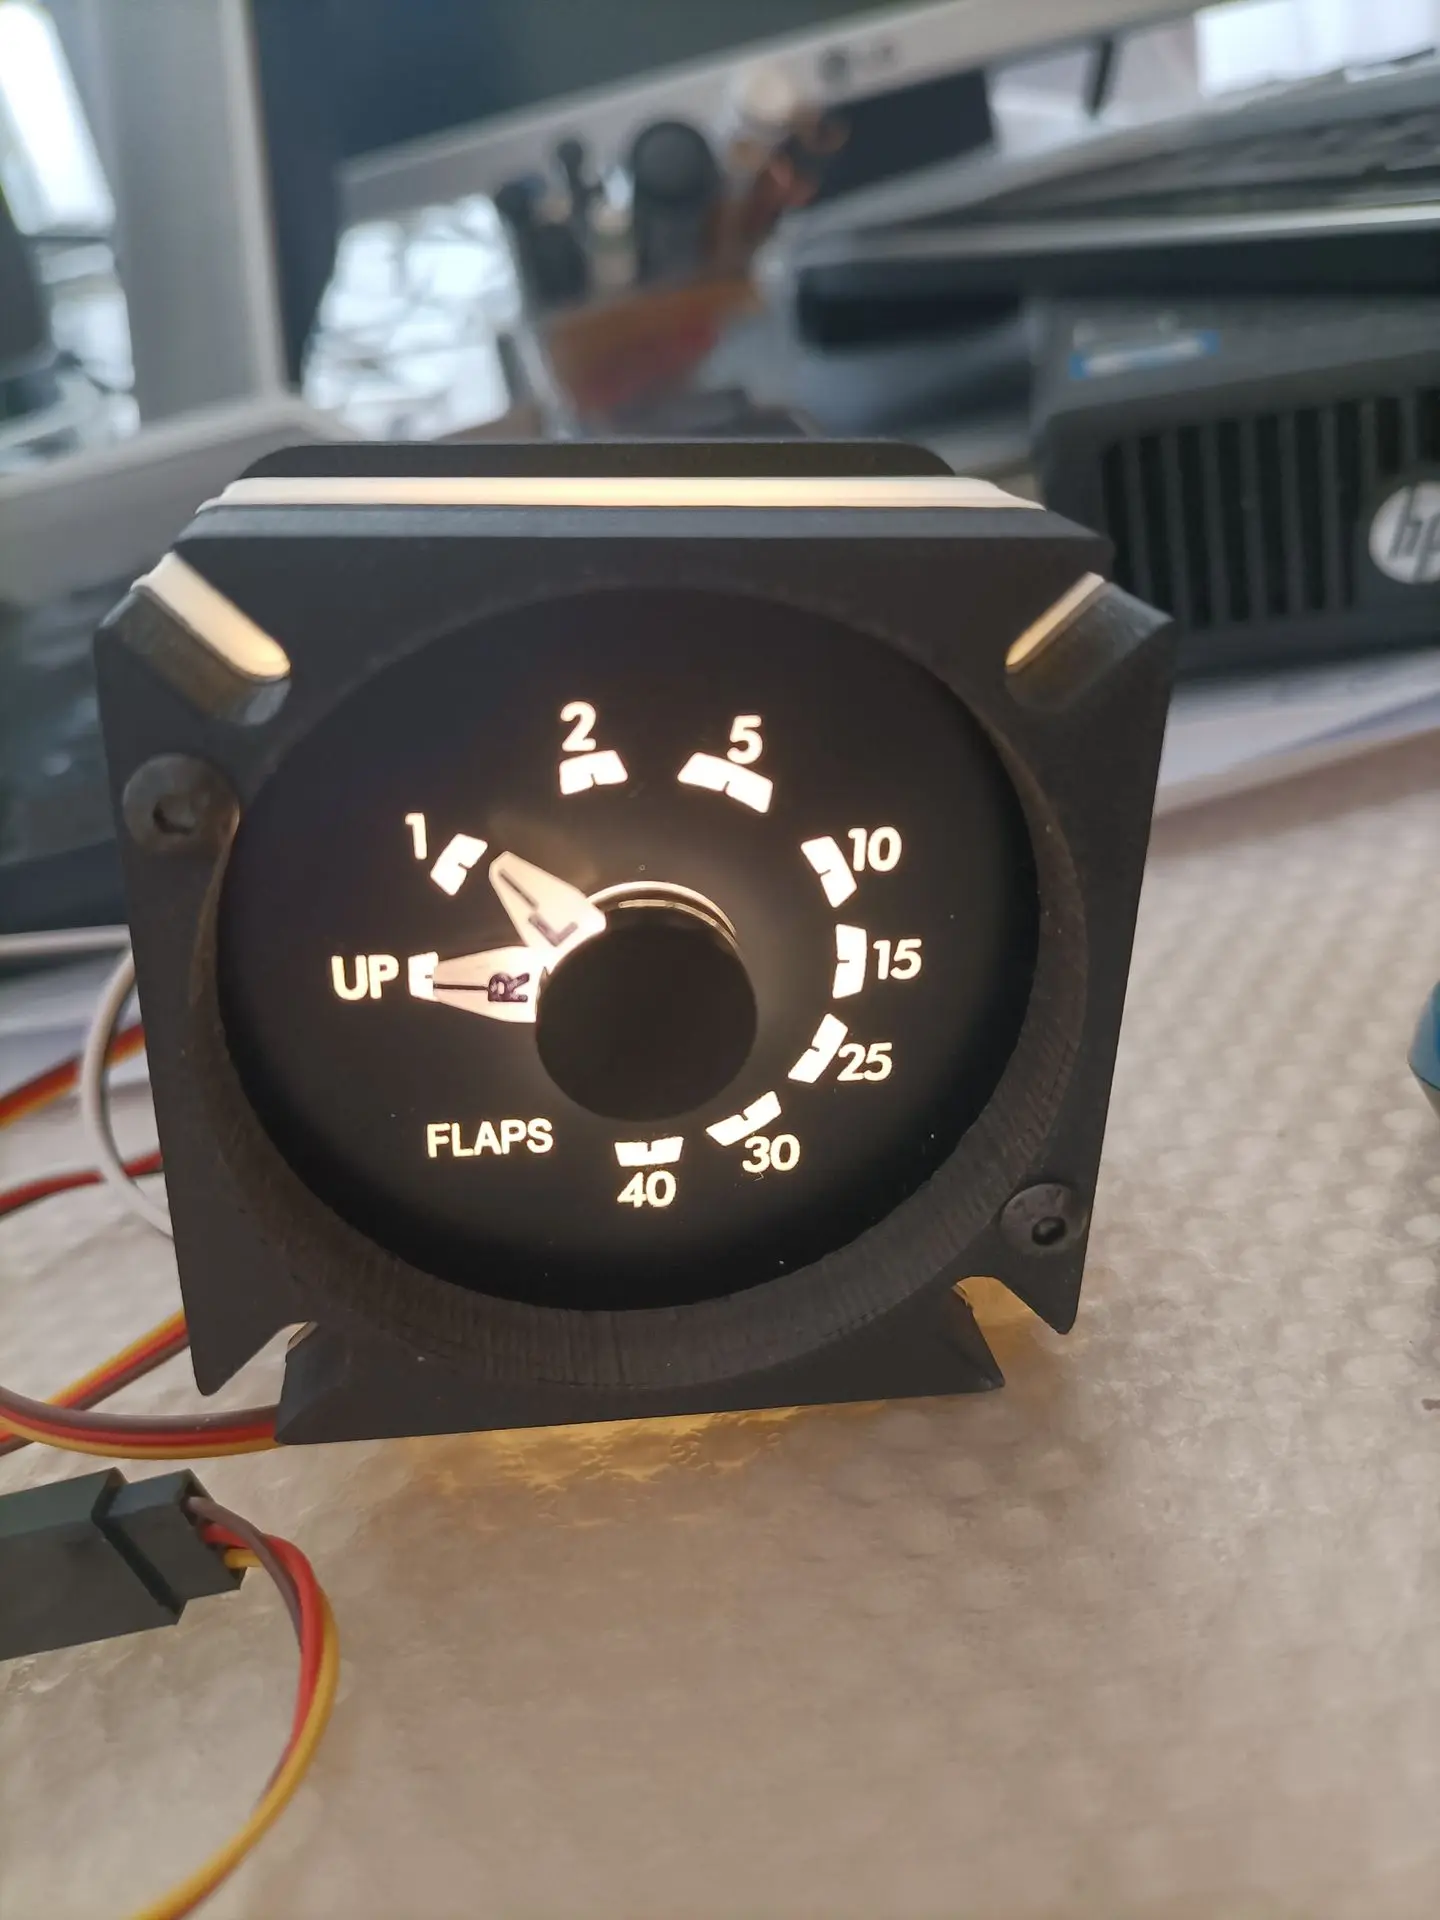
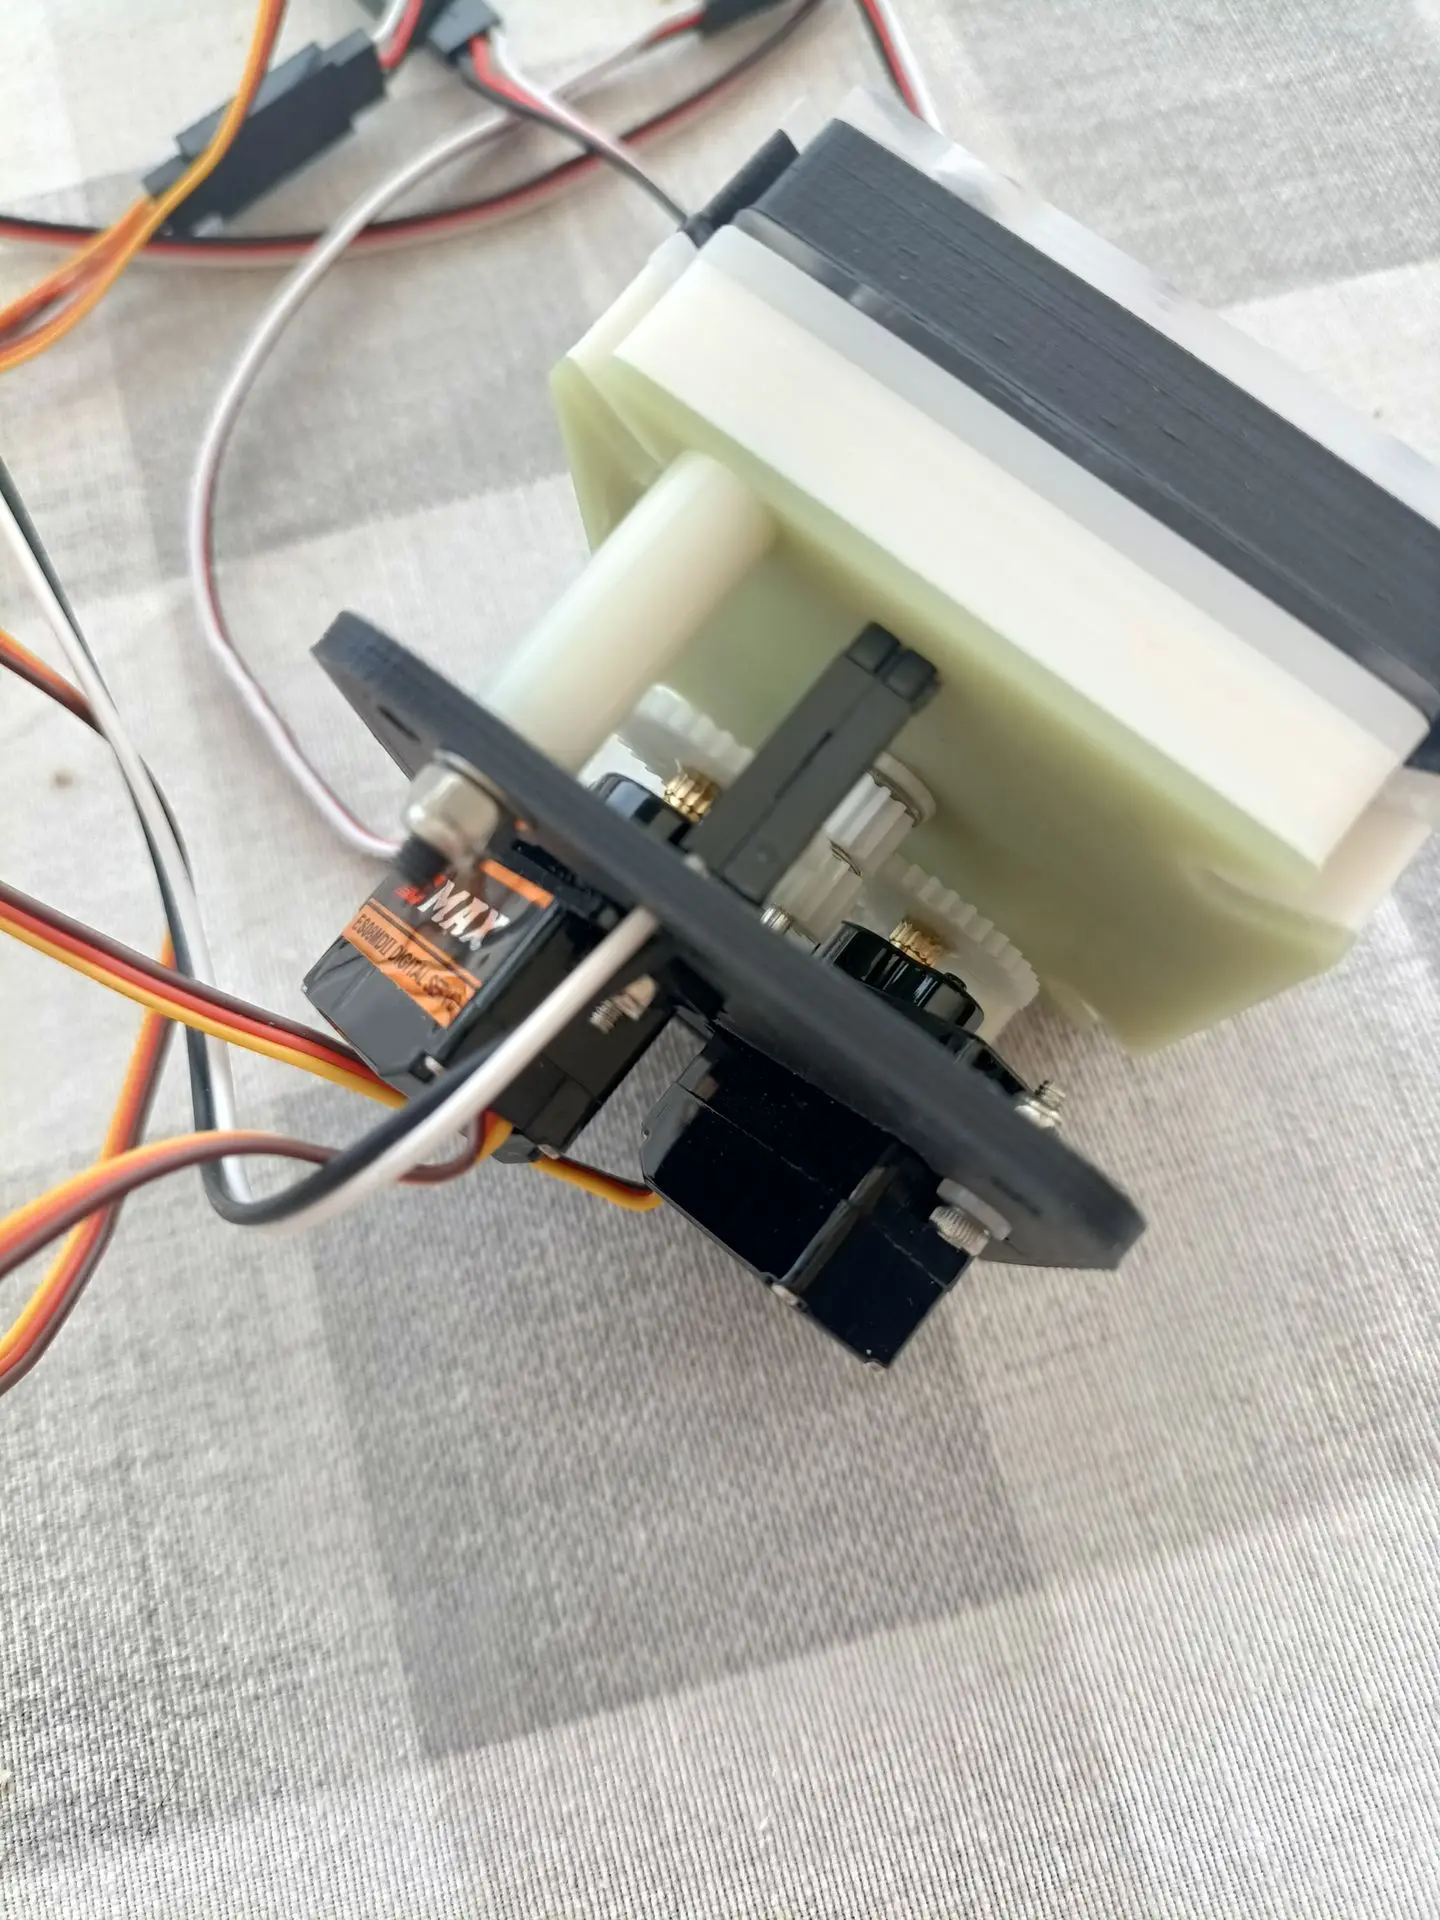
Rebuild by myself...
Pictures of the modifications I have made and the final result. New dial and pointers. The gauge looks a lot better. The last picture shows the engraving at work.


This demo was made with a Maestro servo controller. I specifically let both pointers work separate to let you see the movements.
If the video does not show... you can click the link https://youtu.be/hesyamdDGD0
Modifying a flap gauge